
Why a Morning Yoga Warm-Up Sets the Tone for Flexibility
If you jump straight into deep stretches cold, you are working against your own body. Spending just **2–3 minutes warming up** gradually raises your core temperature, increases blood flow to your muscles, and prepares your joints for the range of motion ahead. Think of it as a kindness to your body before you ask anything of it.
A simple warm-up sequence might include:
- Neck rolls (4–5 slow circles each direction)
- Shoulder shrugs and rolls (8–10 reps)
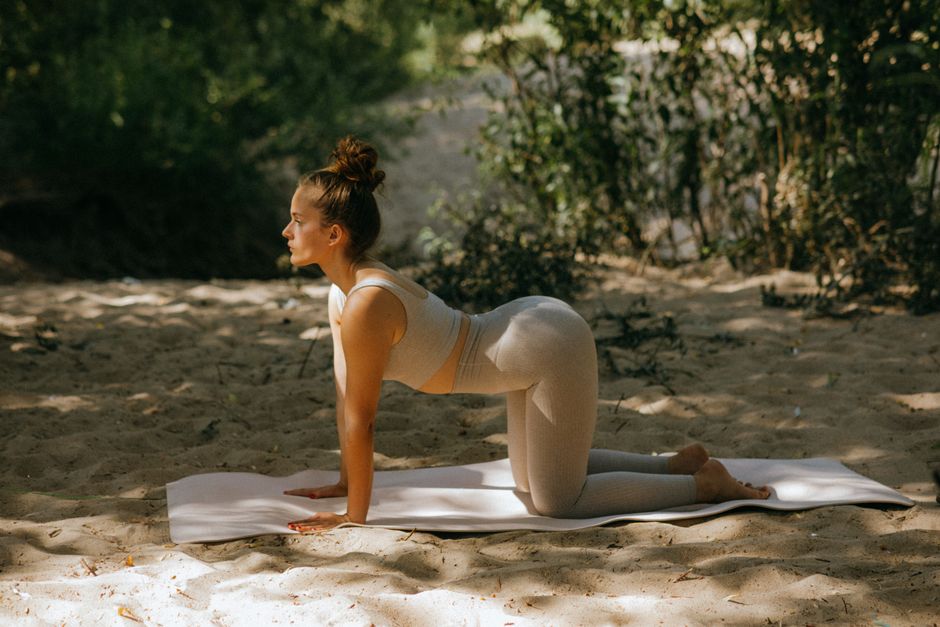
- Cat-Cow pose (6–8 breath cycles) to mobilize the spine
- Ankle circles and wrist rolls if you plan weight-bearing poses
Keep your breathing **slow and nasal** throughout the warm-up. If anything feels sharp or pinching rather than a gentle stretch, back off immediately and consult a healthcare professional before continuing.
Quick pick: Compare top-rated Yoga options.
Sun Salutations: Building Heat in 15 Minutes
**Sun Salutations (Surya Namaskar)** are a linked sequence of 12 poses that build heat, improve coordination, and touch almost every major muscle group in one fluid motion. This yoga practice foundation is what makes a short 15-minute session actually effective.
For a 15-minute beginner session, 2–4 rounds is a realistic and effective target:
1. **Mountain Pose** — stand tall, feet hip-width apart, arms at sides.
2. **Upward Salute** — inhale, sweep arms overhead.
3. **Standing Forward Fold** — exhale, hinge at hips, soft bend in knees.
4. **Low Lunge** — step right foot back, lower right knee to mat.
5. **Plank Pose** — step left foot back, hold 1 breath.
6. **Knees-Chest-Chin** — lower knees, chest, and chin to mat (beginner modification for Chaturanga).
7. **Cobra Pose** — inhale, press chest forward and up, elbows slightly bent.
8. **Downward-Facing Dog** — exhale, push hips up and back, hold 3–5 breaths.
9. Reverse the sequence back to Mountain Pose.
**Beginner tip:** Keep knees bent in Forward Fold and Downward Dog until hamstring flexibility improves over 2–4 weeks of consistent practice.
Standing Poses: Balance and Lower-Body Flexibility
**Standing poses** develop leg strength and postural awareness that make every other yoga posture safer and more effective. They also train **proprioception** — your body’s sense of where it is in space — which reduces injury risk both on and off the mat.
Beginner-friendly standing poses to include in your yoga for beginners routine:
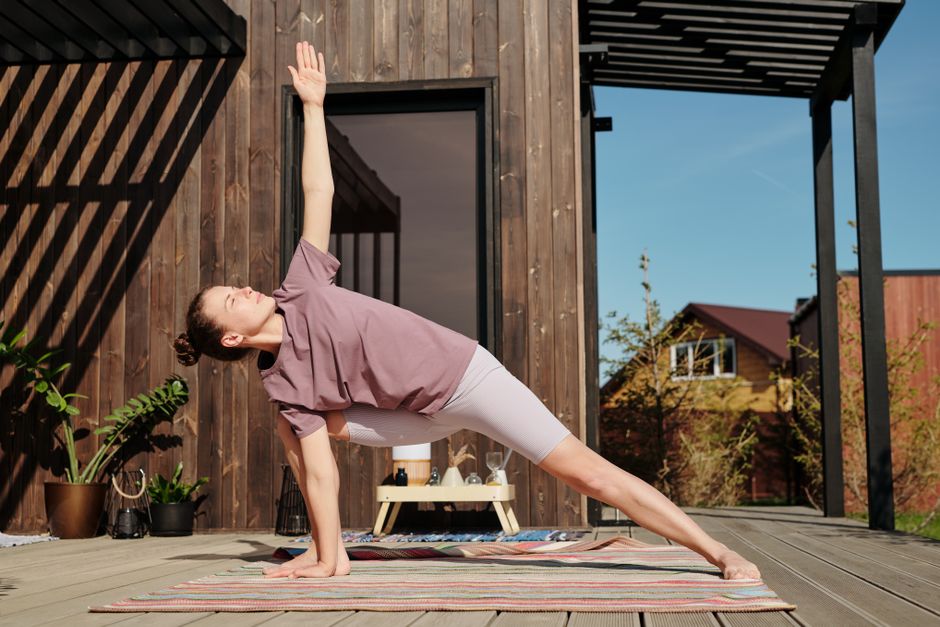
- **Warrior I** — front knee stacked over ankle, back foot at 45°, hold 5 breaths per side
- **Warrior II** — hips open to the long edge of the mat, arms extended, gaze over front fingertips
- **Tree Pose** — place foot on inner calf (never on the knee joint), find a fixed gaze point to steady balance
**Key alignment cues:**
- **Engage your core** lightly in every standing pose — this protects the lower back.
- Press all four corners of the standing foot into the mat.
- Keep shoulders relaxed away from ears; tension there is a sign you are working too hard.
Seated Poses: Targeted Flexibility for Hips and Hamstrings
Seated poses allow you to isolate specific muscle groups — especially the **hamstrings, hip flexors, and inner groin** — without the balance demand of standing work. This makes them ideal for the middle section of a 15-minute routine when your muscles are warm but fatigue is setting in.
Top beginner seated poses:
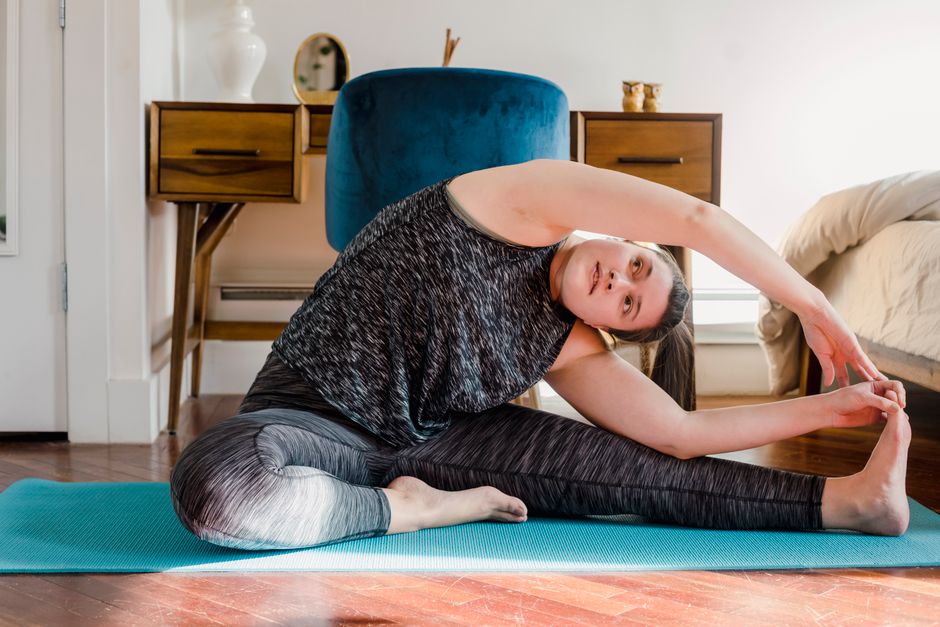
- **Seated Forward Fold (Paschimottanasana)** — loop a **yoga strap** around the feet if you cannot reach them; hold 30–60 seconds
- **Butterfly Pose (Baddha Konasana)** — soles of feet together, let knees drop toward floor, sit tall
- **Half Pigeon (modified on back)** — lying on your back, cross ankle over opposite thigh for a gentler hip opener
When transitioning between seated poses, use an exhale to move and an inhale to set up the new shape. Rushing transitions is where most beginners strain something unnecessarily.
Twists and Backbends: Spinal Health and Posture
**Spinal twists** decompress the vertebrae, improve thoracic rotation, and stimulate digestion — making them especially valuable in a morning routine. **Backbends** counter the forward-rounded posture most Americans develop from desk work and screen time.
Beginner-safe options:
- **Supine Twist** — lie on back, draw one knee to chest, cross it over the body; hold 45–60 seconds per side
- **Seated Spinal Twist (Ardha Matsyendrasana)** — sit tall, place one foot outside the opposite thigh, twist toward the raised knee
- **Sphinx Pose** — forearms on mat, elbows under shoulders; a gentle backbend far more accessible than Cobra for tight spines
**Safety tip:** Twists should feel like a **gentle wringing sensation**, not compression. If you feel any sharp lower back pain, come out and consult a healthcare professional.
Gentle Inversions: Circulation Boosts for Beginners
Full inversions like headstands are months or years away for most beginners — and that is completely fine. **Mild inversions** still deliver circulation benefits and a gentle mood lift from the shift in perspective.
Beginner-appropriate inversions:
- **Legs-Up-the-Wall (Viparita Karani)** — lie on your back, scoot hips close to a wall, extend legs straight up; hold 2–5 minutes
- **Bridge Pose** — feet flat on mat, lift hips; this partial inversion also strengthens the glutes and opens the chest
- **Downward-Facing Dog** — hips above heart counts as a mild inversion and is already part of your Sun Salutation flow
**Who should skip inversions:** Anyone with uncontrolled high blood pressure, glaucoma, or a recent neck injury should avoid even gentle inversions until cleared by a doctor.
Cool Down and Relaxation: Locking In Flexibility Gains
The cool-down is not optional — it is where your nervous system shifts from sympathetic (active) to parasympathetic (rest), locking in the flexibility gains from the session. Budget at least **2–3 minutes** for this phase even in a tight 15-minute window.
Cool-down sequence:
- **Child’s Pose** — hips back toward heels, arms extended or resting alongside body; 1 minute
- **Supine Twist** — if you have not already included it, add it here
- **Savasana (Corpse Pose)** — lie flat, arms at sides, palms up; close eyes for 1–2 minutes of stillness
Deep **diaphragmatic breathing** during Savasana — inhale for 4 counts, exhale for 6 counts — activates the vagus nerve and meaningfully reduces cortisol. Even 90 seconds of this technique makes a measurable difference in how you feel walking into your morning.
Essential Yoga Props for Home Practice
You do not need a lot of gear to start, but a few key props make the difference between frustrating sessions and ones that build real progress.
| Prop | Best Use | Beginner Priority |
|---|---|---|
| **Yoga mat** (non-slip, 4–6mm thick) | All poses; cushions joints on hard floors | **Essential** |
| **Yoga block** (foam or cork, set of 2) | Brings the floor to you in standing and seated folds | High |
| **Yoga strap** | Extends reach in Forward Folds and shoulder stretches | High |
| **Yoga bolster** | Support in restorative poses; reduces strain in hip openers | Optional |
| **Blanket** | Extra cushion under knees or hips; warmth in Savasana | Optional |
Using a **yoga block** under your hand in Triangle Pose, for example, immediately gives you the correct alignment that might otherwise take months to develop on flexibility alone. Props are tools for smart practice — not signs of weakness.
Frequently Asked Questions (FAQ)
Q: What is the best time to do a morning yoga routine for flexibility?
A: Most practitioners find the window between **6:00–8:00 a.m.** ideal — cortisol is naturally elevated, giving you an energy boost, while the quiet of early morning supports focus. Consistency matters more than the exact time; pick a window you can protect 5 days a week.
Q: How often should beginners practice yoga to see flexibility gains?
A: **3–5 sessions per week** is the sweet spot for beginners. Research suggests that flexibility adaptations begin showing within 4–8 weeks of consistent practice at that frequency. Daily practice is fine if sessions are short (15–20 minutes), but two rest days per week prevents overuse fatigue in connective tissue.
Q: What yoga mat and blocks should beginners buy for a home practice?
A: Look for a **non-slip mat at least 4mm thick** (6mm if you have sensitive knees) and a **set of two foam or cork blocks**. A lightweight **yoga strap** rounds out a starter kit for under $40 total. Avoid thin travel mats for daily home practice — the lack of cushioning becomes noticeable quickly in kneeling and seated poses.
Q: Can I do a 15-minute yoga routine every day?
A: Yes, short daily sessions are generally more effective for building flexibility than longer sessions done sporadically. Listen to your body — if you feel overuse fatigue in connective tissue, take a rest day. Two rest days per week is a reasonable guideline for most beginners.
Q: Do I need a yoga mat to start?
A: While you can technically practice on a carpet or firm floor, a **non-slip yoga mat** provides the traction and joint cushioning that makes poses safer and more effective. It is the one essential prop worth investing in before your first session.
Top Product Recommendations
| Product Name | Rating | Key Feature | Est. Price | Action |
|---|---|---|---|---|
| Top-rated non-slip yoga mat 6mm thick | ★★★★★ | Editor-recommended non-slip yoga mat 6mm thick from this guide | $18–$42 | Check Lowest Price on Amazon |
| Best-value yoga blocks set of 2 foam | ★★★★☆ | Affordable yoga blocks set of 2 foam — strong everyday results | $12–$28 | Check Lowest Price on Amazon |
| Premium yoga strap for stretching beginners | ★★★★☆ | Higher-end yoga strap for stretching beginners for visible, lasting results | $45–$95 | Check Lowest Price on Amazon |
Affiliate Disclosure: This post contains affiliate links. We may earn a commission if you buy through our links, at no extra cost to you. Medical Disclaimer: This content is for informational purposes only and is not medical advice. Consult a healthcare professional before changing diet or exercise.